Till here, I guess all of you have successfully downloaded
JDK and Android studio.
Android studio icon will appear on your desktop window. If
it isn’t then search it and create shortcut on desktop.
- Now right click on that icon and click on run as administrator.
Then a windows will open
Here, some components will be downloaded for only one time
i.e. at your first launch only. So no need to worry too much about it.
After finishing download again another window will open

2. This is the important windows. Do not click on Start a new
Android Studio project.
Now, only click on Configuration. Configuration option only
comes when we run the application as administrator and hence we did it.

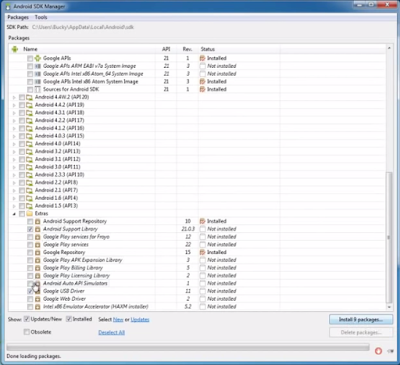
3. Click on SDK manager

4. Here, you will download few external packages which will be
required in future.


Now, close everything and from now, you fully prepared to
start your android studio.

No comments:
Post a Comment